CBM 8296D Repair
-
In July 2008, I purchased a Commodore 8296D from Germany and had it shipped to me in the United States. The 8296D was the last machine of the classic PET/CBM line and was sold primarily in Europe. It is an attractive and powerful 6502-based computer.
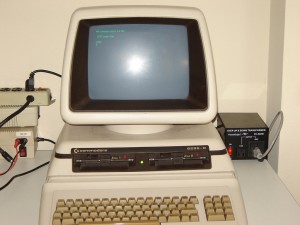
I was able to purchase my 8296D at a low price because it was sold as not functional. I was betting that I could repair it, which was a bet that paid off. The photo above was taken shortly after I got it working.
AC Power
The first challenge was that this computer’s internal power supply is designed for 220VAC/50 Hz input. Mains power here is 110VAC/60 Hz. It turns out that the computer does not mind 60 Hz but a step-up transformer is necessary. Steve Gray, an 8296D owner in Canada, suggested an inexpensive model that worked out nicely. You can see it on the right-hand side of the computer in the photo above.
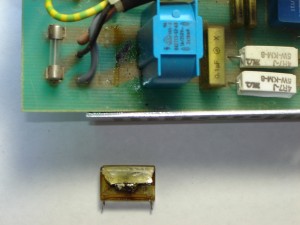
After I got the step-up transformer hooked up, I sat down to troubleshoot the 8296D mainboard. While I was hovering over the board with a logic probe, an “X” safety capacitor right behind the AC input provided some excitement. It caught fire after about five minutes of power on.
I can’t say why this happened for certain. It may have had an internal defect that finally caused it to fail after many years. Also, its rating (250VAC) was very close to the input power. I measured the output of the step-up transformer unloaded at 240VAC. Of course, the step-up transformer also doubles any transient voltages, so it may have seen overvoltage. It may have been a combination of old age and overvoltage.
I replaced it with a higher rated capacitor (400VAC) and haven’t had any trouble since. Thanks to my friend Bob Johnson for advice selecting a replacement. The original is so close to the input voltage that I’d recommend any 8296D owner to do the same, especially if the computer will be left unattended with the power on.
PLA Replacement
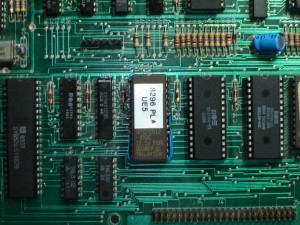
The 8296 mainboard is notorious for the PLAs in UE5 and UE6 failing so this was the first place that I looked. Mine had a bad PLA in UE5 and once this was replaced, the computer started right up.
UE5 was not socketed but there were obvious signs of rework on the board. Unbelievably, it looks like a previous technician replaced it and did not install a socket, leaving me the work of desoldering it and installing the socket.
The original PLA is no longer available. I selected a fast EPROM (AM27C512-45, 45ns) to replace it. Since the EPROM has a different pinout than the PLA, I built a small adapter using a socket and 30 guage Kynar wire for the connections. Credit to Joachim Nemetz for the original instructions on how to do this.


