DRY up testing in Rails with Autotest
-
As Rails developers, we’ve been trained hard to test early and test often. We are also acutely aware of the DRY principle (Don’t Repeat Yourself). However, these ideas don’t quite agree in Rails because in our test-code-test cycle, we’re constantly typing
rakeevery time we need to run our tests.Autotest will DRY up your testing by running your tests automatically whenever your files change. In this article, we’ll explore Autotest:
- Installation
- Starting Autotest
- Stopping Autotest
- Autotest Plugins
- Coloring with RedGreen
- Notifications
- Next Steps
Installation
Autotest is a smart little program included in the ZenTest bundle of goodies. To install it, you’ll just need to install the gem for ZenTest.
gem install ZenTest
Depending on how your system is set up, you might need to run this as the root user or through
sudo.Starting Autotest
Running Autotest is as simple as running rake. First, change to the root directory of your Rails project. This is the directory that has
Rakefile,app/,config/, etc. Next, run theautotestcommand:$ autotest
Autotest will discover that it is running inside a Rails project and your tests will run just as they do with
rake(or the wordierrake test).After your tests run, Autotest will not exit back to the shell prompt. It will then sit and poll your files. When it notices files that change, it will run the tests for only the files that you’ve changed! It will do this continuously until you stop it.
Stopping Autotest
Pressing
Control-Conce will run your entire test suite again.Pressing
Control-Ctwice in quick succession will exit Autotest back to the shell prompt.Autotest Plugins
Autotest includes a plugin mechanism that allows plugins to monitor different aspects of the testing lifecycle. Autotest includes a number of useful plugins out of the box.
In the next sections, we’ll see how to activate the plugins and what functionality they provide.
Coloring with RedGreen
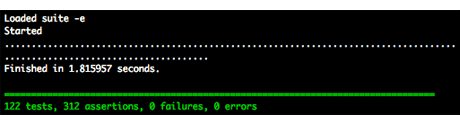
One of the problems of testing under
rakeandautotestis that a lot of output can be generated and when looking at the results, you sometimes have to filter out the normal output to see the failures.RedGreen is a simple Autotest plugin that solves this problem by coloring the summary lines of the test output either red or green to indicate whether the tests passed or failed:
Autotest automatically looks for a dotfile (
.autotest) when it is started. This file may be in your Rails project directory or in your home directory where it will be used by all projects.To install RedGreen or any other plugin, create the
.autotestfile with a simplerequireto load the plugin:# .autotest require 'autotest/redgreen'
That’s it! When you run autotest again, the plugin will be automatically loaded and your test output colored.
Notifications
Autotest also comes with the plugins
growl,snarl, andkdenotify. Each are installed the same way as shown above, simply add the require line to your.autotestfile. These allow Autotest to communicate each respective notification system.
Using one of these can be useful when running autotest in the background or in a minimized window. The screenshot above shows a Growl pop-up notification from Autotest under Mac OS X.
Note that for Autotest to send notifications to Growl, the
growlnotifyutility must be installed. This comes in theExtras/directory of the Growl disk image.Next Steps
Autotest isn’t limited to plugins shown here. There are a number of other useful plugins you can explore and more are added all the time. The plugins can be found in
/path/to/your/gems/ZenTest-x.x.x/lib/autotest.While Autotest can be an invaluable tool when testing Rails applications, it isn’t limited to Rails at all. Autotest can be used with an Ruby project that follows some simple conventions.
Visit the Autotest section of the ZenTest RDoc to learn about this, writing plugins, and more.